Command : S3d_DrawStairDlg

Before you start this command, you have to draw a line that will be the basis for the stair.
The line defines the begin at the bottom and the end at the top (not necessarily the floor height), the slope and the middle of the stair..
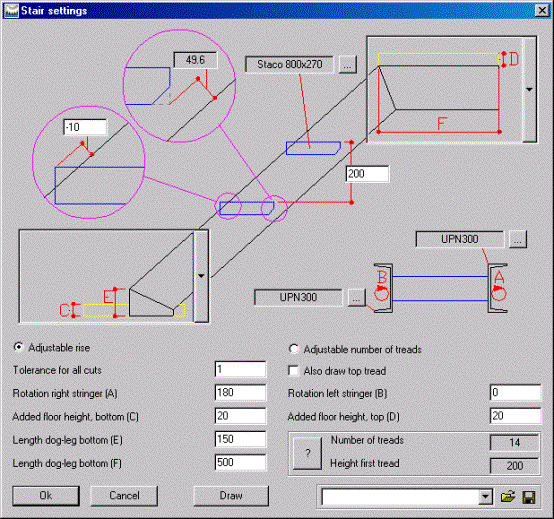
After starting the command and selecting the line, you get the following dialog box:

Most options are well illustrated, but some still need to be clarified:
Adjustable rise: When enabled, you can adjust the distance between treads in the image. The program will calculate the required number of treads. The remaining distance will be used for the first tread. If you would like to know the height of the first tread for the number of treads you entered, click on the button “?”.
Adjustable number of treads: When enabled, you cannot adjust the distance between treads, but you can adjust the number of treads. The distances between the treads will be made equal. If you click on the button “?”, you can see the distance between the treads in the image (this option is only available when you are drawing one stair at a time – you selected only one line).
Added floor height: This option has no influence on the stringer, only on the calculation of the treads: the height of the floor bottom and top will be subtracted from the total height of the stair used to calculate the number of treads. The first tread will be placed above the bottom floor height.
Rotation stringer : The rotation of the stringer (options A and B) allow us to rotate the flange of the U-beams to the inside (to the treads).